The Battle for Hill 112
This Tour takes approximately 4 hours
This page covers the tour to the site of the Battle for Hill 112 in Normandy where fighting raged for over six weeks in June, July and August of 1944. There is a short description of the places and sites to see at the top of this page followed by a more detailed explanation of the history of the battle and where the sites fit in to it overall
Please Click Here for Local Travel Information
June 26th-August 4th 1944
Operation Epsom
Following the earlier failures to capture or encircle the strategically important town of Caen and with it still frustratingly just beyond his grasp, on June 18th 1944 General Montgomery issued a directive for the capture of the high ground south-west of the town between the Orne and Odon rivers. This high ground overlooked the city and Montgommery believed if the British could take possession of it that this would make the German positions in Caen untenable and thus force the enemy to withdraw. He allotted the four divisions of Lieutenant-General Dempsey’s VIII Corps to the task totaling some 60,000 men and 600 tanks. The attack was due to begin on the 22nd of June, and was given the code-name “Epsom”.

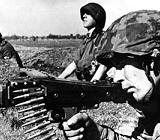
The SS defenders of Hill 112
Although the high ground that was the operation's objective was labeled 'Hill112' on the Allies maps, it was not so much a hill as a high point on a long, low ridge. Unimposing as it looked, Hill 112's tactical importance was the view it gave over the countryside to the south, west and east of Caen, and had prompted Rommel before the invasion to remark that should the Allies land in the area that “the side that controls Hill 112 will be the side that controls Lower Normandy”. With this in mind and determined to deny the heights to the Allies, the Germans had set up a strong defense of the area using the best, most ruthless and most fanatical troops at their disposal- the I and II SS Panzer Corps. The British VIII Corps start line for the attack was along the Caen-Bayeux railway, behind the British front lines which were a couple of miles further south along the top of a ridge looking south-east over the river Odon to Hill 112. The Germans held all the ground down to the river and still controlled the few stone bridges that allowed access to the Hill on the other side. From their jump-off line the British troops had to advance through their own front lines, down the other side of the ridge, through several fields of fire from interlocking German anti-tank guns, machine guns, artillery and mortars, capture or construct under fire the bridges necessary to cross the river and then assault the high ground of Hill 112 on the other side.

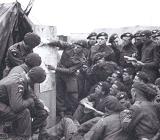
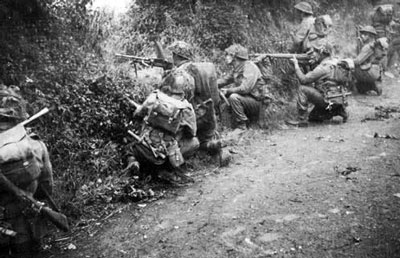
15th Division moving up to the line
Of the four divisions to attack, by June 18th only one, the 7th Armoured Division, had landed in France. There were huge delays to the Allied build up owing to the weather and it was June the 25th before the three missing divisions, the 11th Armoured, the 15th Scottish and the 43rd Wessex , had arrived and everything was finally in place and the following morning the attack kicked off at 0730am by the 15th Scottish Division. However, the SS defenders had survived the British bombardment and forced the Scottish advance to a slow, arduous slogging match. It was the morning of the 27th before the Scottish finally arrived at the bridge over the Odon but managing to surprise the German defenders, the bridge was captured intact and the Scots moved into the village of Baron just to the south of the river at the foot of Hill 112. The next day the 11th Armoured Division took over the advance from the Scottish and pushed up to the crest of the hill. They were immediately ambushed by the 12th SS Panzer Division Grenadiers who were dug in there and although they successfully beat off three German counter attacks, they were unable to gain complete control of the summit.
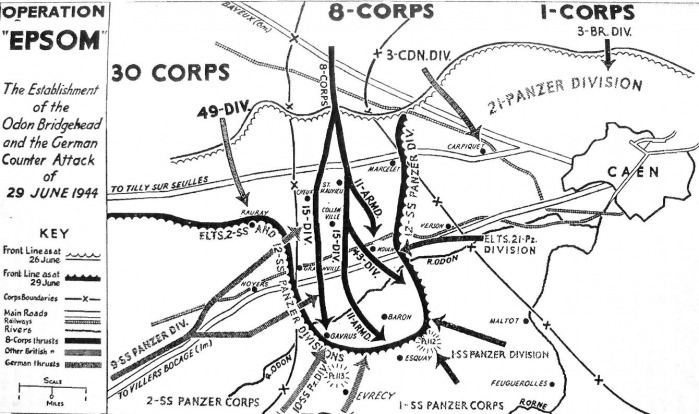
Op. Epsom
The advance thus far had led to the development of a salient extending into the German front line (see the Map “Op Epsom” attached). Although further attacks on June the 29th had been successful elsewhere on the battlefield, apart from some outpost positions on Hill 112 itself, the British Forces had been forced to withdraw and give up these most recent gains almost everywhere owing to strong German counterattacks. Despite that there had been no further advance south, the salient was widened as more British forces moved into the area. Allied intelligence had now identified the German 9th SS, 10th and 12th SS Divisions in opposition and fully expecting a major counter-attack that night, all armoured forces were withdrawn south of the river after dark, forcing the British to give up their positions on Hill 112 for the second time in as many days. As the British withdrew on June 30th, the SS again re-occupied Hill 112. The anticipated strong German counter-attack the following morning was beaten off after some fierce engagements and the fighting then degenerated into a series of localized attacks and counter-attacks, and even these had petered out by July 5th.
Operation Jupiter

British troops advancing to Hill 112
But with the capture of Hill 112 considered necessary to widen the front, a second operation code named “Jupiter” was planned for July 10th. In this attack the British 43rd Wessex Division was to attack positions held by the 10th SS Panzer Division supported by the 102nd SS Heavy Tank Battalion. Like Michael Wittmann's 101st SS Heavy Tank Battalion it was equipped with the formidable Tiger Tank. Although jumping off from much closer to Hill 112 than their June 26th start line and again supported by a massive pre-attack bombardment, the British Churchill, Cromwell and Sherman tanks supporting the Wessex Division were no match for the Tiger tanks opposing them and the attack immediately stalled. After the 9th SS Panzer Division were brought back to reinforce the 10th SS Division already engaged, the British forces were unable to take the summit and the British attacks were finally halted on July 22nd. In the twelve days of operation Jupiter the 43rd Wessex Division had suffered 7,000 casualties out of a total strength of 16,000, over 40% of the Division.
British troops attack Hill 112
It was only finally on the night of August 4th that a patrol from the 53rd Welsh Division discovered that with Caen no longer in their control, Hill 112 had lost it's importance for the German defenders and they had withdrawn, allowing the 53rd Division to finally occupy the high ground without a shot being fired.
Sites/Sights to See

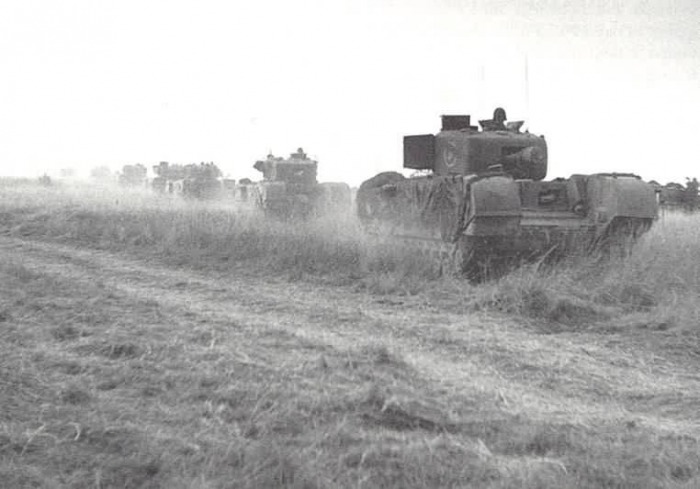
43rd Division below Hill 112
You will be driven down the route taken by the 15th Scottish Division as they advanced on the 26th of June and shown the positions occupied by the defending SS soldiers, down to the bridge over the river Odon that was captured intact and on up to the village of Baron where the front was later to settle. You will also see the scars of battle still evident in the village today before going up to the summit of Hill 112 where there is today a monument to the 43rd Wessex Division beside a British Churchill tank. From here you will see the impressive view the position commands and will understand the importance the Germans attached to holding it and the importance the British attached to capturing it. After this, you will see the smaller scale but longer duration Operation Jupiter, starting with where the attack was launched from. You can then follow the advance as it made it's way forward on July 10th until halted by the SS defense. You will be shown the defensive positions occupied by the Germans and the very effective system of defense they employed.